Tuesday, 25 November 2014

DV2901 (Component A) - Rigging

Model Rigging

Firstly before approaching to rigging my model, I had to watch youtube tutorial videos to understand the basics of skeleton joints, IK handle and parenting controls.

Maya Rigging 101 - Simple IK rig (James Thompson)

During this video I have learnt how to apple parenting, skeleton joints, and how to use IK handles. I will implement this knowledge in rigging my character.

Basic bipedal character rigging setup in Maya - Part 1 of 7 (Jamier Telford)

This video is a series of tutorial on how to rig a basic bipedal character. I have learnt where to apply the skeleton joints and how to bind meshes. I have Watched this video just to see how to lay out the skeleton joints.
 Using what I learnt from the second video, I applied the skeleton joints where its needed to be. I started off by adding the spine joints.

After applying the middle joints from the hip to head. I firstly applied joints to the right sight of the limbs and using the mirror joint tool reflected it at the YZ Axis.

Using the smooth bind tool, I firstly selected the limb joints one by one and binded it to the models limbs mesh. I did this for the head and bottom flaps.

 I then applied IK handles to the limbs head and the flaps. I did this one by one.

 Using curves. I parented the IK handle to the circle which I will be using as the control. I Did this throughout the joints that moves. Using the move tool and pressing V I snapped the curve In the Middle of the moving joints (This is done before parenting the curve to the IK Handle)

 After Doing the controls, I separated the Controls in a new Layer, i similarly did the same for the joints and the mesh. I locked the joints and the body so that it cannot be altered. I then hid the joints so that the rig does not become confusing.


This is the final outcome of my model. Which I will use in compositing a live action and animation.

DV2901 (Component A) - Texturing

Model Texturing

For the material of the character i have decided to use lambert due to the fact that it suppose to be like cardboard box, and cardboard box does not reflect light but absorbs it similarly to the material lambert. Due to the basic polygon shapes that I have used I have decided to use UV texture editor and exporting the UV to photoshop.


Here I have selected a section of the model and using the rendering shelf. I opened the UV Texture editor.


After selecting the mesh. In the UV editor window, I use the UV Snapshot option and export the UV map as an ''.iff'' file.


Onced exported the UV map Should look like this, which I will then import to photoshop, ready for editing. The UV map is what ill use as guides to where certain details will go in the model.


Using the picture reference of the texture, I used the colour detector tool in photoshop and roughly drawn in the shades of the box and added a logo. After doing so I remove the UV map template and export the texture as ''.iff'' file. I repeatedly did this for teh different sections of the model.

After producing all the texture files, I then created a series of materials renaming them regarding the part of the model they are going to be applied to. After doing so I go to the material attribute and click the checkered box next to colour and selected file and uploaded the appropriate texture file.


After applying all the textures, correctly this is the outcome, I am fairly happy with what the outcome. As i was able to replicate the shadings that is seen in the picture reference to create a ''stained coffee'' effect.


A render screenshot of the textured model.

DV2901 (Component A) - Modelling

Modelling - Danboard

Before starting to model the toy, I had to look back at the experimental work that I to see the improvements I can make to my final model.


Using a simple polygon, I produced the basis of the head. During the production of the head I have to make sure that I have enough edges in order to add the facial features and head add-ons. 


From what I learnt from the experiment I selected 4 vertices of a square and moved it outwards to create an octagon, after doing so using insert edge loops i added more edges and vertices, in order to make the eyes more rounded, in comparison to my experimental model. After doing so I then selected the middle face and extruded it inwards. Using edges as markers i reproduced this on the opposite side. and using similar technique I produced the triangular nose.


After Modelling the main base of the head and the facial features, I then have to model the top lid of the ''box'', I did this by using a cube shaping it like a long rectangle then flatting it and adding cuts at the long corner of the rectangle, I duplicated this then reflected it. and connected it on top of the head.


Using edges and faces and split faces tools, I created a switch by using extrusion, and adding basic polygon cub shape within the extruded faces.


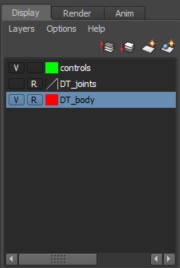
I then did the rest of the body using the same techniques applied to the head. but for the joints i have used cylinders and balls. in order to get the measurement and distances correct i have to look at the attributes tool and make sure that the x y x values are identical or the opposite.


After Modelling the whole body, I then used insert edge loops tools around the edges of the main body head , legs and arms to add a bevel to the corners, so that it is not as sharp. As in the picture references the edges are not at a 90 degree sharp angle.


Using the same techniques applied in producing the head lid I did the same for the bottom foot of the legs of the toy model.


From what I have learnt from the experimental, I did not use extrusion and rotation tool to produce the ''flaps'' instead i created rectangle polygons and rotated it at more than 45 degree and attached it all the way around the bottom edges of the main body.

In the final model I have decided not to add the arm flaps. This model is now ready for the next stage which is texturing.

DV2901 (Component A) - Planning


Final Idea

For my final idea I have chosen to do ''Danboard'' this is due to simplistic yet unique style to it. In order for me to get a grasp of the different parts of the model i have decided to do some perspective drawings of the model in different positions.


Looking at existing ''Danboard'' design, I have found that most designs Only include logos in them, so I have decided to add the Universities logo in the toy model just so it looks unique from the other existing designs. After doing the sketches I decided to quickly model the idea to see which areas I can improve.

References/Planning

I have found some images that I will be using as my final references in producing the model. these images included a front and back view of the model so that I am able to see the different angles of the toy, and identify the different components.


 Texture


Before starting to model the toy I decided to choose the type of colour scheme it will follow. I have decided to follow the original Danboard colour scheme which is a ''coffee stain'' colour. For the texture i have decided to use a linear bump map which currently exist in the default library in Maya 2015.


Pre-Production

Moreover, before modelling the final toy model, I wanted to experiment, first by just rough modelling the toy on Maya. Also I can use this experiment to better my model when finalizing my final model.

Using basic shapes, vertices,face and edge tools I was able to produce this model roughly. During the production of this model I have also used the Duplication tool,Insert edge loop tool and extruding.

During the Production of the circular holes and embeds of the model, I have encountered some problems. Instead of the eyes being circular it  turned into an octagon, similarly to the silver screw located in the body. In order to better this in the final model, I will have to add more edges and vertices to create a more circular eyes and silver crew.

The ''Flaps'' of the Danboard was produced using rotation and mostly insert edge loops and extrusion. Using this method complicated the production of the Flap as it made it uneven all the way around. In order to fix this I will just use another polygon shaped like a flattened rectangle and angle it at roughly 45 degree and attach it at the bottom of the body. I will have to do this four times around the edges of the body.
For the Flap on the arms, i have yet to decide if I will keep this in the final design as this might interfere when it comes to animating the toy model. Also if I do decide to keep this feature I will have to shape it better rather than leaving it as a place square shape.

DV2901 (Component A) - Possible Ideas


Possible Ideas

During the course of this week, I have to come up with a possible idea that will be brought into my final decision. After brainstorming and looking at different types of two legged toys, I kept looking and found two possible candidates that I will be using as reference that I will model and rig in Maya.

These are the two candidates: 


DOMO Batman

This toy is part of a ''Domo'' toy collection in which comes in different types of customized american super heroes costumes. I have decided to add this toy into my ''possible ideas'' as i believe it has a certain uniqueness to it, also it has visible obvious polygons which I believe i can interpret into Maya.

Here I have played around with Maya using insert edge loops to add edges, vertices to create more complex shapes and soft select to move affected faces.

DANBoard Robot


This toy captured my eye as it contains very simple polygon shapes which is mostly cubes, and at the same time it has some sort of uniqueness to it, like its a very timid and cute character. Looking at the model that I did for the domo Character i believe that using this instead of the Domo Batman can be more effective and at the same time learn more about modelling and rigging just by using basic shapes. In addition, if i do decide to use this toy as my main reference I will make sure, I will add personal touches to it; as of at the picture it looks too plain.

DV2901 (Component A) - Planning Brainstorm for Toy


Ideas Generation - Child's toy


In order for me to come up with ideas, I will have to look at existing toys that fulfilled the module requirement. In order to do this during this week I started to look at my sisters toys, and what captivated me was her two legged stuffed toys. However I thought that it was too early for me to finalise on what to base my idea on. So I decided to look in the internet and looked at existing toys.

Here are some examples:

This is a stuffed toy which incorporates simplistic style and monotone colour. I thought that I could use this image to help me inspire coming up with ideas.

Here is a plush toy of the Stitch from Lilo and Stitch, as I was looking at stuffed toys this caught my eye due to the simplistic style and how you can easily see and define the different sections of the toy, as this will come in handy when modelling in Maya with something that has similar body type. 


This is some of the characters that appears in toy story in which I believe fits this modules criteria. Also due to simple polygons visible in some of these toys. It is achievable for me to finish the work within the time scale we have.